Let's be real, changing the strings on your guitar isn't the most exciting thing. And I know how easy it is to ignore your strings for weeks and months. But when I do change my strings and tune my guitar up, there's just nothing like it! I'm always so glad I did and I kick myself for not doing it sooner.
Why should you change you strings? For one, the tone is a lot more harmonic. Which really just means it sounds clearer, has better resonance and sustain, and has a brilliance that old strings lack. On top of that, new strings hold their tuning way better than old strings.
It can be intimidating the first few times you change your strings. It all gets much easier after you do it a few times though, and a lot quicker. I'd say it only takes me about 10 minutes from start to finish these days. So let's demystify the process of changing strings and break it down step by step.
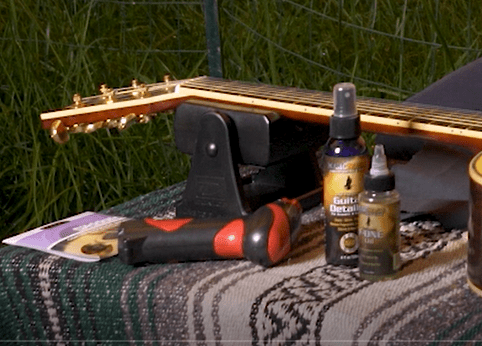
First, you'll need a couple tools:
- New Guitar Strings
- String Winder
- String Clippers
- Guitar Polish
- Lint Free Polishing Cloth
One other thing you can get is fretboard conditioner. You can go on Amazon or into your local music shop and most likely find a kit that has polish, fretboard conditioner, and a polishing cloth. Same with the string winder. The string winder is going to save you a ton of time here, and even those cheap $3 winders are amazing tools (that will last years and years). I have an electric string winder to save my wrist and hand some grief.
Step 1 - Remove The Old Strings
You should never clip strings that are under any tension. This could cause the string to flail wildly and either hit your guitar or your face. Neither are good. So make sure to fully unwind the old strings before clipping them. Some people like to do one string at a time to maintain tension on the neck. In my experience this isn't necessary as long as you put strings on right away. Plus taking them all off will let you condition your fretboard.
Start by unwinding all of the strings. Once that's done you can clip them with your clippers. You can find some that are made specifically for guitar strings, and some string winders even have clippers built in. I personally use wire cutters that I have in my toolbox. You can cut the string anywhere, though I prefer to clip them higher to leave a lot of string on the bridge. It makes it easier to pull the strings out of the bridge.

Next you can pull the bridge pins out if you have them. The best way is to use the pin puller in your string winder. Most will have a slot that will slide right under the bridge pins. Carefully pull the pins up and remove the string, and set your bridge pins together in a safe spot.
Unwind the strings at the opposite end from the tuning machines. Then you can throw away or set aside the old strings.
Step 2 - Clean Your Guitar
The same dirts, oils, and acids that cause your strings to dull get all over your guitar and fretboard. While the strings are off you should clean your guitar. The polish will act as a general cleaner and get rid of the grime on your guitar's finish. Besides making your guitar shine, it will protect the finish from long term damage. Make sure to get the headstock and the back of the neck too!
Fretboards are generally not finished with a heavy top coat, meaning the wood is more or less exposed. Fretboard conditioner is a hydrating oil that keeps the fretboard in good....condition.

It also acts as a cleaner to get rid of some of the gunk. Since the strings are off, the conditioner goes on! Just put a bit on the fretboard and rub it in with a lint free cloth. Wipe off any excess and you're ready to move on to the next step.
Step 3 - Put Your New Strings On
I personally use 12 gauge D'Addario strings, and they have colored ball ends that help you know what string goes where. Some strings have individual packages that tell you the size. Either way, the thinnest string is closest to the ground when you hold the guitar, and the thickest is closest to the ceiling. You can start with the lowest or the highest string.
Take your first string, and put the ball end into the bridge in the right hole. If you're starting with the highest string, it would go in the bottom hole in the bridge. Push it through and then put the bridge pin in so the slotted size is facing the fretboard. Then as you're pushing the pin in, pull the string with your other hand so the ball end catches on the pin. This is what will hold the string and the pin in place. Pull the string taught while pressing the pin down, making sure not to apply too much force anywhere.
What brand of strings are the best?
I get this question often. I usually use D'Addario EJ16 Light Gauge Phosphor Bronze Acoustic Guitar Strings.
As long as you're using any decent guitar string the actual difference in your sound will be small. The big difference, by far, and I mean like the difference between going around the block or traveling to Thailand from the US, will be your PLAYING TECHNIQUE and the QUALITY OF GUITAR.
Oh… And by the way… A mediocre set of strings when brand-new sounds better than the most expensive when they get old. Change your strings more often than you think you need to... I have to keep telling myself that 🙂
Want more... check out: 10 Things You Should Know About Choosing the Best Guitar Strings
Once the string is in place at the bridge you can move up to the tuning machine. Pull the string through the correct tuning machine.
Once you pull the string through, back the string out 3-4". This will let you have enough to wind around the tuning peg a few times. Then crimp the string in the direction you'll wind (see below) and start winding.
Notice the direction the strings are wound in the above picture. They all are wound towards the outside of the guitar.
- The three lower strings should be wrapped counter clockwise.
- The three higher strings should be wrapped clockwise.
Wind the string up until it has good tension. You don't have to get it to the right pitch just yet.
Repeat this process on the remaining 5 strings.
The thicker (wound) strings wont need as many wraps as the two high (unwound, or plain) strings. The winding will catch and hold the string in place. The two high strings will need to be wound a few more times to make sure they stay in place.
Step 4 - Tune Your Guitar
The last step is to tune your guitar and get the strings stretched. Start by tuning the 6th (lowest) string, then move onto the 5th, 4th, etc. Once you've tuned all of the strings, tune them all again! If you're not going to play guitar right away you can leave your guitar and let your strings stretch out naturally overnight. You'll need to tune it once or twice when you go to play it next.
If you're going to play your guitar right away, you can manually stretch your strings. Here's how to do that, starting with your lowest string:
- Place a finger on the 2nd fret, and with your right hand grab the string over the sound hole.
- With your right hand, gently pull the string up and away from the body a couple times. You don't have to pull it up much.
- Re-tune the string, it should have dropped down a step or more in pitch.
- Repeat the process until the string doesn't lose pitch when you pull it.
Repeat with all 6 strings, being especially careful on the unwound strings.
I recommend fretting the 2nd fret just in case your nut has any sharp edges. As long as you're not pulling the string too hard you shouldn't need to worry about breaking any strings.
Step 5 - Clean Up The Strings
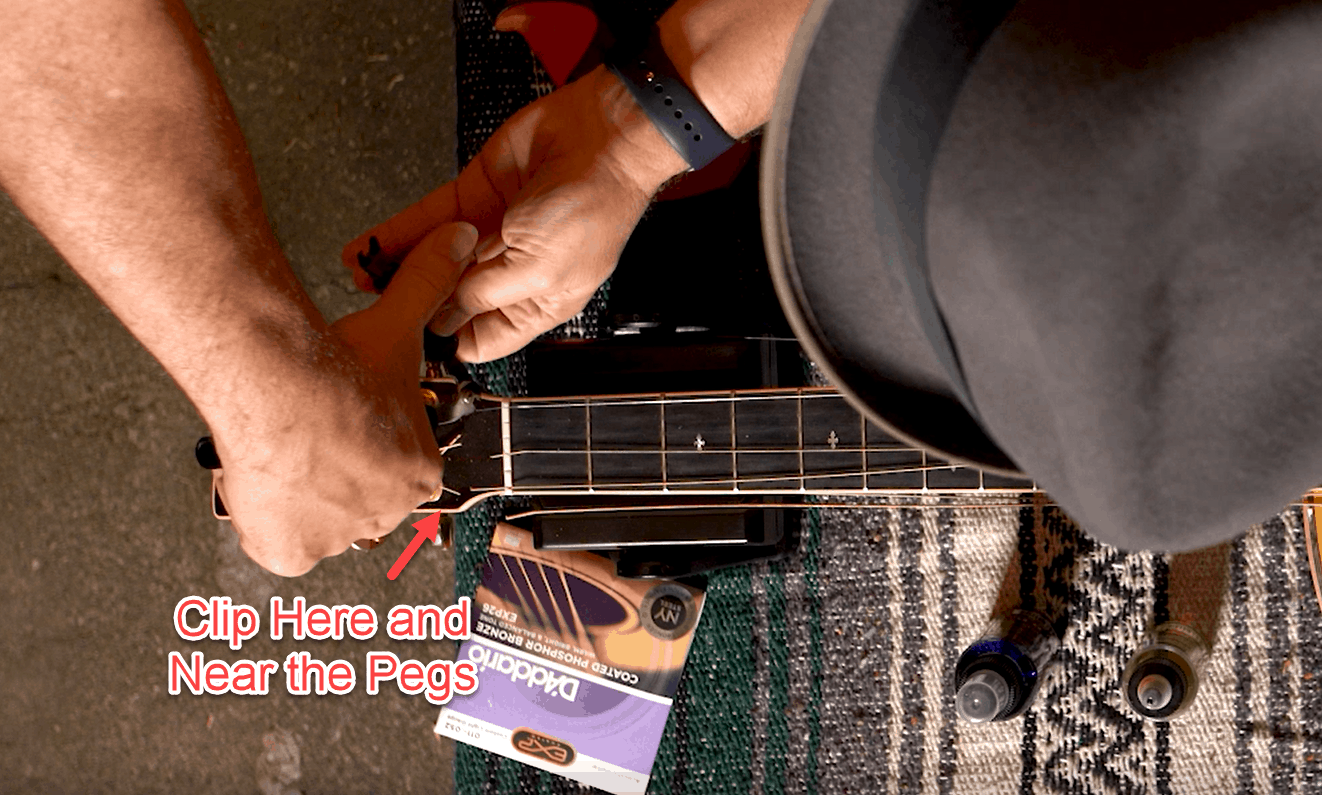
Whether you let your strings stretch overnight or stretch them manually, make sure to clip the excess string at the headstock. If you leave them you're risking an eye injury, and they'll buzz and make your guitar sound bad. Clip them leaving only about 3/8" of string remaining.
Once you're done you'll be able to enjoy one of the best things on earth: a guitar with fresh strings!
Once you have new strings and a clear guitar, there are a few things you should do to maintain your guitar. Check out this article on Maintaining Your Acoustic Guitar. If you liked this lesson and want to see more like it, let me know in the comments!
