Being able to change strings on your guitar is a very important part of learning how to play guitar. This can be quite the adventure for new guitar players. And quite frustrating too! But knowing some tricks and tips can make this much easier. It’s one of those things that gets way easier once you do it a few times.
Classical guitars are a little different to string than other acoustic guitars. They can be a little tricky. But by the end of this article you’ll have all the knowledge you need to successfully change your strings.
Things You'll Need To Change Your Strings
- Pack of New Classical Guitar Strings
- String Winder
- Wire Clippers
- Polish Cloth and Guitar Polish (optional, but highly recommended)
Changing Strings On A Classical Guitar
I’m going to change one string at a time. This is a good way to do it when you start out. You’ll need to start by removing the string you want to replace.
Removing Your Old Classical Strings
First of all...
Never cut a string that has tension on it!
You always want to unwind the string so it doesn’t have any tension, then cut it with your wire clippers. If you didn’t unwind the string before clipping it, it could end up hitting you in the face. On top of that, the sudden drop in tension isn’t good for your guitar. A gradual decrease in tension (unwinding, then clipping) is much safer.
So unwind it, then clip it and remove it. I like to clip the string closer to the bridge and the sound hole. I find it easier to remove the knot in the bridge.
Once that is done you’re ready to add the new string.
Never cut a string that has tension on it!
Installing Classical Strings (Wound Strings)
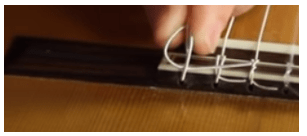
We always start with tying the string to the bridge. It’s less of a tie and more of a wrapped knot. This knot will essentially wrap the string over itself so it doesn’t move.
Once you have your old string off of your guitar, grab the new string you’re going to replace it with. Slide one end of the new string through the bridge, away from the neck. You should have 2-3” of string.
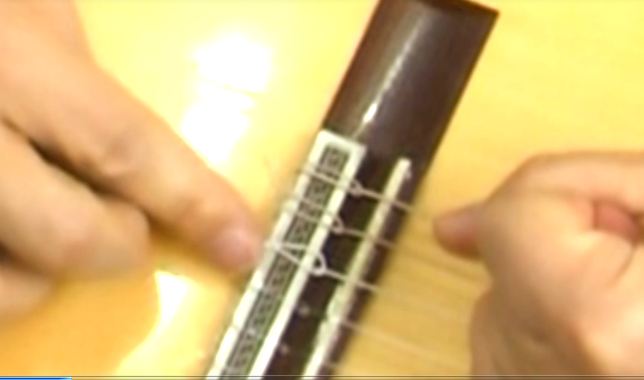
Then take that short end, bring it back over the bridge counterclockwise (towards the high strings) and wrap it around the long end of the string, then back so it’s again facing away from the neck. The short end essentially did a U-Turn around the long end of the string. So it will be facing the same direction as when you started, with a loop around the long end of the string on the other side of the bridge. You can use your fingers to hold things in place.
The last thing you’re going to do is thread the short end between the string and the bridge. To do this, take the short end and place it under the string wrap down towards the higher strings.

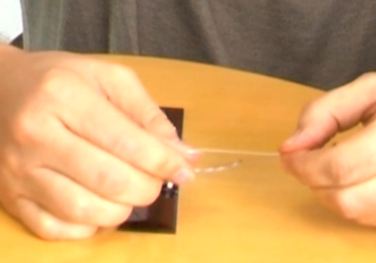
Then tighten the knot by holding the long end and the short end and pull them both until the knot is in place. If you did this correctly it will hold while you finish installing the string.

Now you can grab your string winder. This is a must have. It will make your life so much easier. Take the long end of the string and thread it through the correct tuning machine. Line the hole in the tuning machine so your string passed straight through it, parallel to the fretboard. The string should end up threading towards the tip of the headstock.
Once you thread it through the tuning machine, pull about 2-3” of slack. Now grab your string winder and start winding! Make sure that the string is being wound over the tuning machine, towards the tip of the headstock.
Installing Classical Strings (Unwound Strings)
Unwound strings are a little trickier. They don’t have a winding that catches on itself, so they can slip out of tune easier. To fix this you have to do a couple more wraps on the bridge and the tuning machine.
Starting at the bridge, pull through about 3-4” of string away from the neck. Do the same U-Turn around the long end of the string (still counterclockwise). With a wound string you would thread it through between the bridge and the loop once. On unwound strings you’ll want to thread it through 2 or 3 times. After looping, pull both ends tight. That should hold in place.

Now head up to the headstock and thread the string through the tuning machine like before. Line the hole of the tuning machine so your string stays parallel to the neck when threaded through it. Your string should thread towards the tip of the headstock.
Pull 3-4” of slack. In order to keep the string from slipping you’ll need to add a loop so the string winds over itself. Take the end of the string and do another U-Turn over the longer end. Go counterclockwise to keep things consistent. Now start to wind the string.

If you looped it correctly the string should wind over the loop. This is what will keep the string from slipping.
You can also do this same loop on your wound strings. The wound strings naturally overlap if you left enough slack before winding. But these extra knots don’t take any more time so it may be worth it.
Stretching Your Classical Guitar Strings
After you change your strings it’s time to tune up and get your strings stretched. Even though classical guitar strings are made from a strong material with a high tensile strength (how much “stretching” it can handle before breaking), they’ll still fall out of tune a lot when they’re new.
You have a couple options here. You can let the guitar strings stretch and set naturally over time, or you can stretch them yourself.
Stretching Guitar Strings Naturally
Start by tuning up. I like to start with the Low E string and work my way up to the High E string. Once you get to the High e string, go back and check the tuning on all of the strings. You might have to do this a couple times.
From here you can let your guitar sit for a couple hours. When you come back to it you’ll notice it will be out of tune. That’s expected. Tune it back up and play away. Just make sure check the tuning every few minutes since the strings can still be stretching.
(Checking your tuning every few minutes is a good practice. The more in tune your guitar is, the better it will sound. The better it sounds, the longer you'll want to play)
Manually Stretching Guitar Strings
Manually stretching your guitar strings is one more step in the process, but takes care of your stretching in about 5 minutes.
Start by tuning all of your strings up to pitch. Check them all twice to make sure they’re in tune. Then you’ll start to stretch each string one at a time.
Let’s start with the Low E string. Place a finger on the second fret like you’re going to play that note. With your other hand grab the string somewhere around the 15th fret and gently lift away from the guitar. You’ll be pulling the string up away from the fretboard.
Give it a gentle couple of pulls and release. Your string will go out of tune so tune it back up. Do this a few times until pulling your string doesn’t change the pitch. Then move onto the rest of the strings.
It’s very important that you don’t pull too hard on the strings! You want to pull them just enough so they stretch. Pulling too hard could break the string. You’ll get a feel for it, but start on the gentler side.
Cleaning Up Your Guitar
After your strings are on, you can clip the extra bits of string down at the bridge and at the headstock. This is important to do. Leaving the excess string is a bit of a hazard and someone can get poked! They also cause extra buzzing in your guitar which isn’t very pleasant.
But don’t cut them too short or they might slip. The sweet spot is somewhere around ⅜”-¼”.
The guitar polish is optional, but it’s a good idea to do every time you change your strings. Our hands and fingers have natural oils and acids that can hurt our guitars over time. This is actually one of the big reasons guitar strings lose their brilliance over time.
By polishing your guitar you’re removing the oils, acids, and dirt that might be sitting on the surface.
What Are The Best Classical Guitar Strings?
The age old question! While there is definitely something to be said about quality, most strings in the $12-18 price range will be pretty comparable.
I personally use D’Adarrio Pro-Arte EJ46TT. I like the way they sound and the way they feel. They also hold up pretty well. These could be a good place to start, and D’Addario is a good brand.
I would recommend experimenting and trying something new for awhile when you change your strings. Let your ears and fingers tell you what’s best for you!
Want to learn Spanish Guitar 14-Days FREE!? Check out the link below!

