Changing chords on guitar on time seems to be an issue for many, especially when starting out. After playing and switching chords for some time it gets easier. However. it’s difficult to play songs or exercises if you struggle to get from one chord to the next.
In this lesson, I’m going to teach you three strategies for changing chords on time. Someday you’ll change all the fingers at once… easily! These strategies will get you there faster. In addition, the habits you develop along the way will be invaluable.#1 - Build from the Bottom
The first strategy is to build your chords from the bottom up. Many students place their chords one finger at a time, typically starting with the higher notes. However, it is more advantageous to build a chord starting from the bass note and then placing the other fingers.
This is because when you change a chord, the strums typically start from the bass note, which you’d have in place if you follow this strategy. Then you get just a little bit of extra time to place the other fingers on the right notes just before you play them.
Let’s practice that with the chords D and then C. Hit the D and then pay close attention to how your middle finger moves from the F# on the D chord to the bass note of C (which is C). Doing this will help you get in the habit of placing the bass note first, as it is the first one we play.
Now let's try with an Am and a partial barre F chord. Here, you’ll be moving your ring finger from the second string second fret on the A minor to the fourth string third fret for the bass note of the F chord.
Let’s try one more, this time Em to G. Your middle finger moves from the Em chord to the third fret sixth string to get that G bass. Focus on that and place the rest of the fingers once the bass note is there.
I encourage you to practice those three motions to help you develop a habit of placing the bass note first. This strategy also works for more complex chords, and with time it will become second nature.
#2 - Minimum Movement
The second strategy has to do with minimum movement. For this, we are going to use two techniques. One is a pivot finger and the other is a guide finger.
The pivot finger means that you find a common finger between two chords and leave it there, as opposed to lifting your entire hand and placing the finger again in the same exact position.
Let’s try this technique using the chords C and Am. Both of these chords have two fingers in common. In other words, when changing from C to Am, your index and middle finger do not need to move. They stay planted.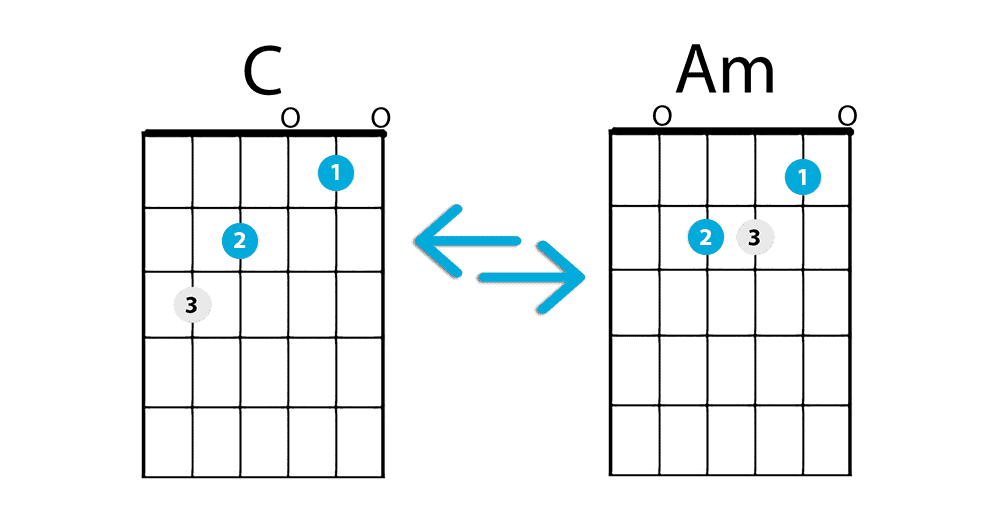
To go from C to Am, simply move your ring finger from the C bass note to the third-string second fret for the Am chord.
Another change that involves a pivot finger is from D to a Cadd9 chord. The fingers that move are the index and middle. The ring remains planted in both chords, as both D and C4 have a note in common.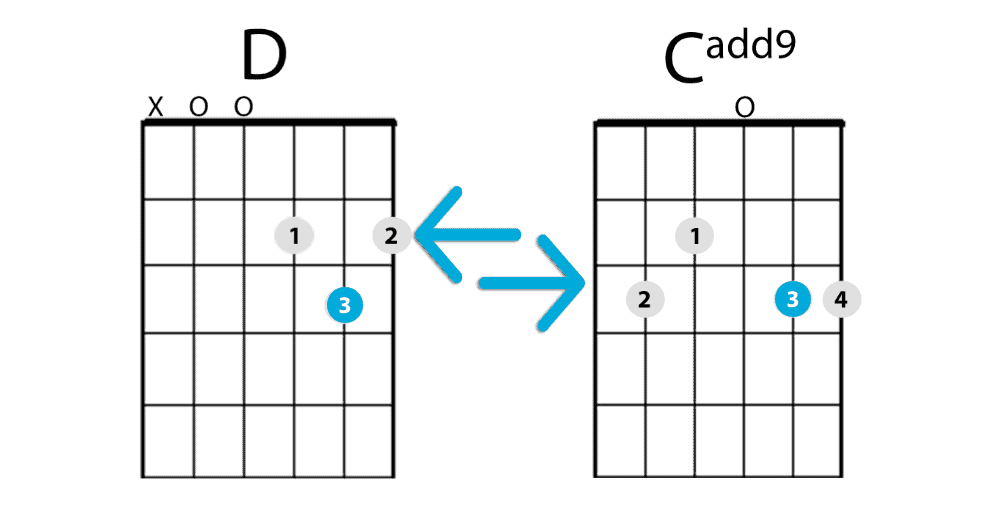
The other technique is the guide finger. Guide finger means that the finger remains on the same string but slides up or down any given number of frets.
Let’s try that with the progression E to D. Here, we’re gonna keep the index on the third finger and slide it just one fret lower. This will take us from the third-string second fret on the D chord, to the third-string first fret for the E chord. Naturally, both the middle and ring fingers move to their respective positions on both chords.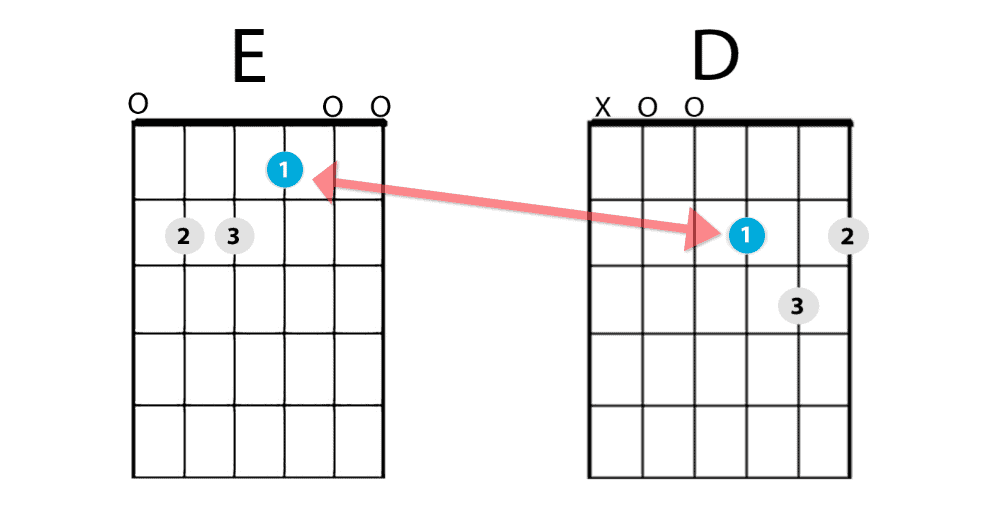
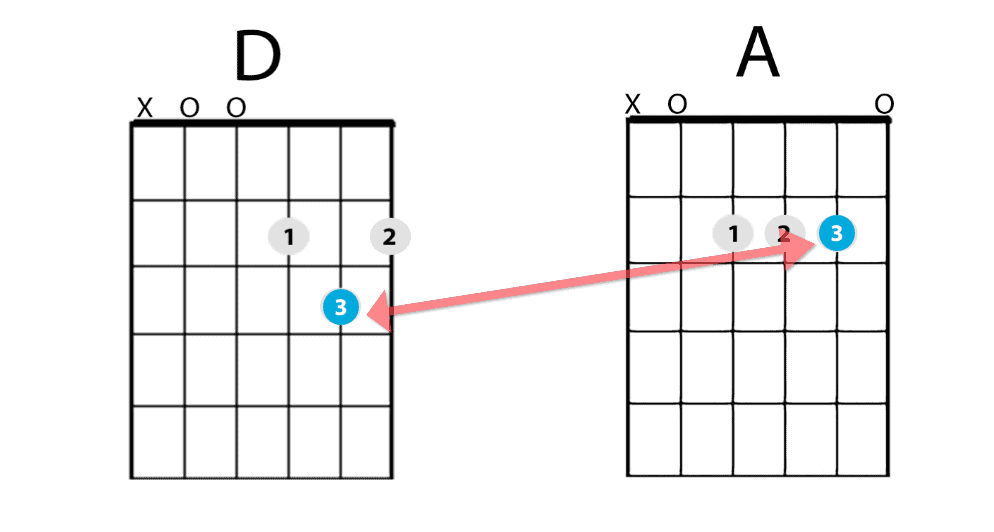
The same applies from D to A, where we slide the ring finger from the third to the second fret.
#3 - Common Chord Shapes
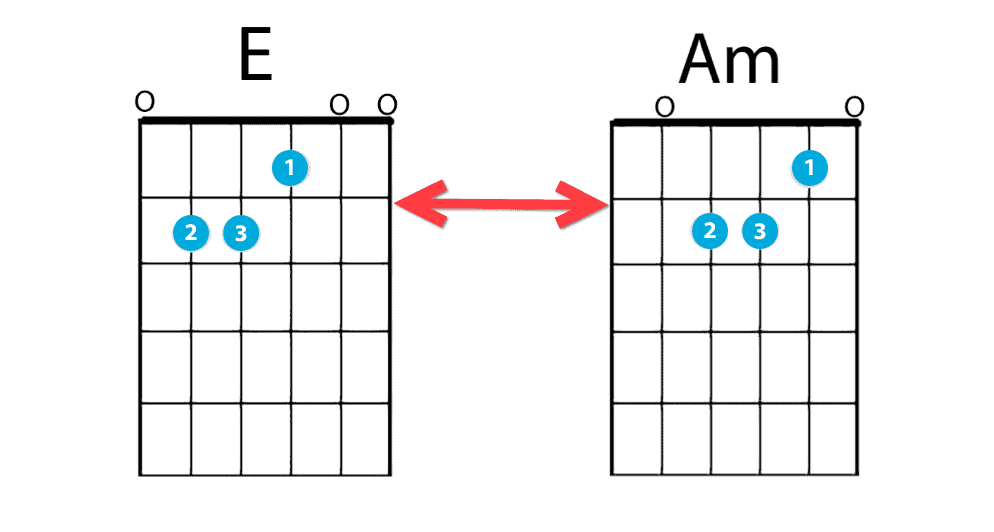
The third strategy is common shapes. This refers to chords that share the same shape, but on different strings or frets. For instance, one of the most common is E to Am. These two chords have the same shape, but one string higher. In other words, to move from E to Am, all you have to do is move your fingers to the strings right below.
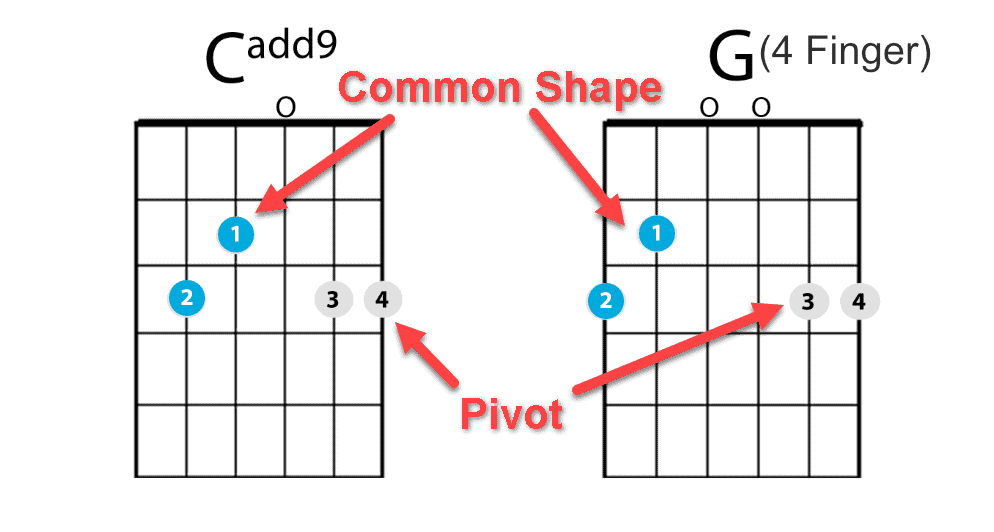
Another progression that has common shapes is the Cadd9 and G. If you play both of these chords with the pinky on the third fret first string, the lower half of the chord features the same shape. To move from Cadd9 to G, all you have to do is move your index and middle finger from the fourth and fifth strings, to the fifth and sixth, respectively.
Conclusion
These three strategies will help you switch chords in a smooth and effective manner. If you practice them, you will develop the ability to change chords without hesitation. You’ll sound musical and have more fun in the process!
Remember to take it slowly at first and enjoy!
